 Old Antique Play Kitchen - Check
One Candle - Check
Dark Brown Paint - Check
Sponge brushes - Check
Sand Paper - Check
Crystal Door Knobs - Check
One Hunk of a husband (optional) - Check
I LOVE the Thrift store.... specifically Dessert Industries.... in fact... if I am looking for something fun to do to get out of the house... D.I. is most likely where I will go. Of course I usually have to do it while my husband is at work. He is not a fan like I am... in fact he will go into the store and within the first 10 minutes he will already be asking when we are going to leave... but for me Thrift Store shopping is relaxing and so exciting at the same time... Its amazing the things you can find. I have decorated our whole home from Thrift Store finds... (all of which is in storage at the time.) You just need to have an eye for things and or learn how to picture an item either repainted, refinished or even just imagine them out of the thrift store atmosphere..... If you can do that....you can find so many many treasures... and above all save A LOT of cash money!
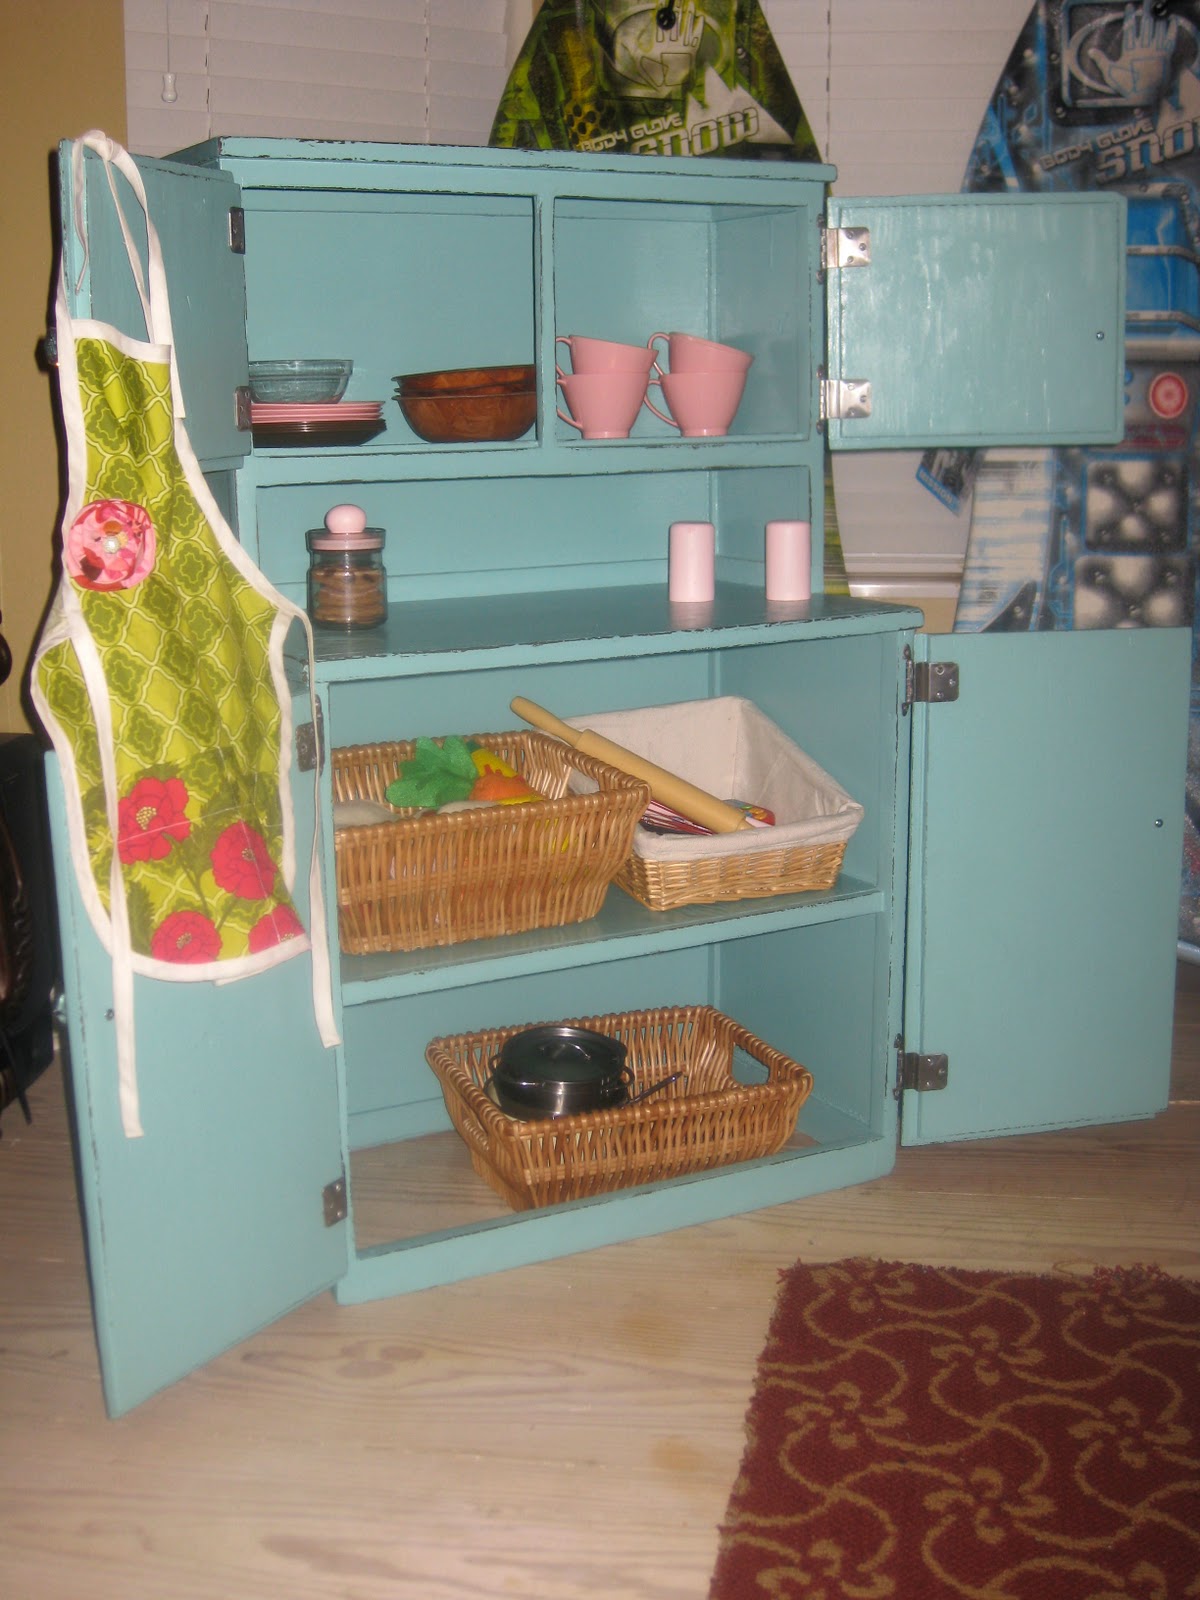
 For example... I wanted to get my little Reagan a Kitchen set for Christmas but everything I saw was either too cheap looking or just outrageously priced.... So for me this $9 beauty was a gold mine to find at the thrift store..... I'm sure a lot of you might be saying to yourself that this play kitchen is a mess and is in no way a beauty..... This antique play Kitchen has been through A LOT as you can tell... and I quickly found out it had been through close to 5 different paint jobs... and the last one looks as if the kids did the painting them selves.... so on the outside you would be right,.... but I could see right through all the abuse and it was exactly what I was looking for..... let me show you what I was able to do.
I then took the brown paint and I painted all the edges... I did this because this is where I was planning on "distressing" the wood. I obviously didn't take the time to do it nice and neat because I was simply going to be painting right over it.


Reagan LOVES it and plays with it all the time. Her favorite thing to do is make me soup. It was so much fun create... It was a lot of work... but it makes it all worth it is to see just how much she loves it and just knowing that I did it.
No comments:
Post a Comment